
Polishing Disks
No reviews yet
$59.95 – $89.95
-
Polishing Disks (3-pack) are a key component of Basic Technique Scratch Removal. These non-abrasive disks work in conjunction with the Gforce Max, Backer Pad, and Polishing Compound to create distortion-free results in minutes.
Disks come in packs of three. Available in three sizes.
Distortion-free scratch removal wouldn’t be possible without these non-abrasive Polishing Disks. Polishing Disks are also used during the “clearing stage” of Advanced Technique Scratch Removal.
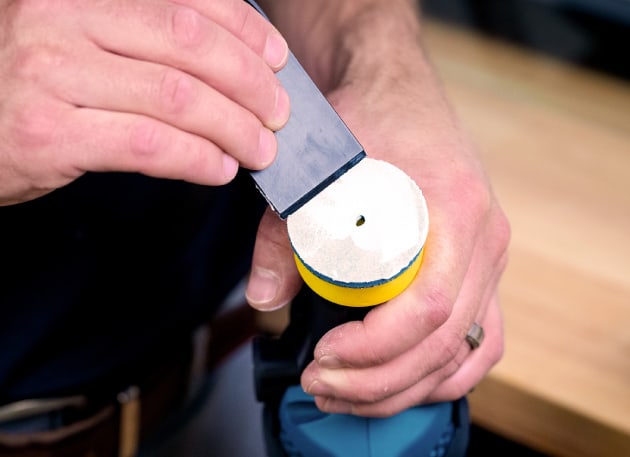
Water Feed Hole: All sizes include a center water feed hole. This allows for water to flow on-demand when using Gforce systems with a built-in water feed (including the Max). If your Gforce system does not have a built-in water feed, the center hole will not cause issues.
Two Sizes Available
- 2-inch: Ideal for most damage
- 3-inch: Ideal for hard-to-reach areas, mirrors, and for removing clusters of scratches
- 5-Inch: Ideal for covering larger areas of light to medium depth scratches
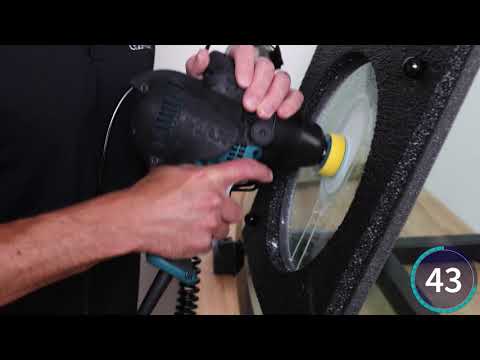
Once the Backer Pad has been screwed into the nose of the Gforce tool, press the polishing disk white-side down onto the black hook-and-loop material of the Backer Pad.
Click here to learn how to use Polishing Disks during Basic Technique Scratch Removal.
Durability: Each Polishing Disk can be used for up to 20 hours of scratch removal. Once they become wafer-thin, Polishing Disks should be replaced.
Note: Photos shown are for illustration purposes only. Actual product may vary due to product enhancements and adjustments.
How to Remove a Scratch
Step One
Apply Polishing Compound
Apply Polishing Compound to the Polishing Disk
1/6
1/6
How to Remove a Scratch
Step Two
Press the Disk Against the Glass
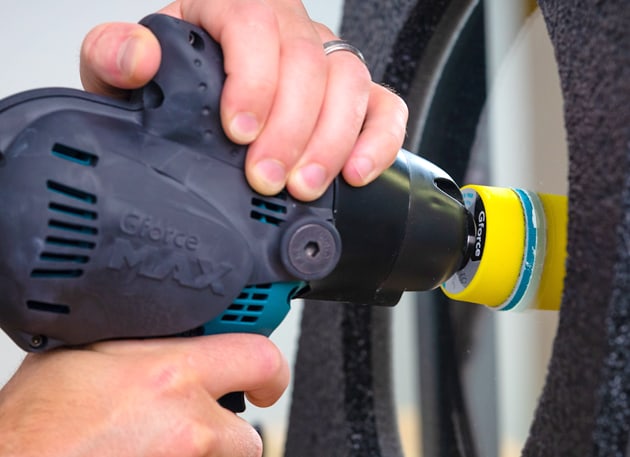
While gripping the Max, press the disk flat against the glass on the scratch.
2/6
2/6
How to Remove a Scratch
Step Three
Run the Max
Using medium pressure, run the Max back and forth along the length of the scratch.
3/6
3/6
How to Remove a Scratch
Step Four
Add Water as Needed
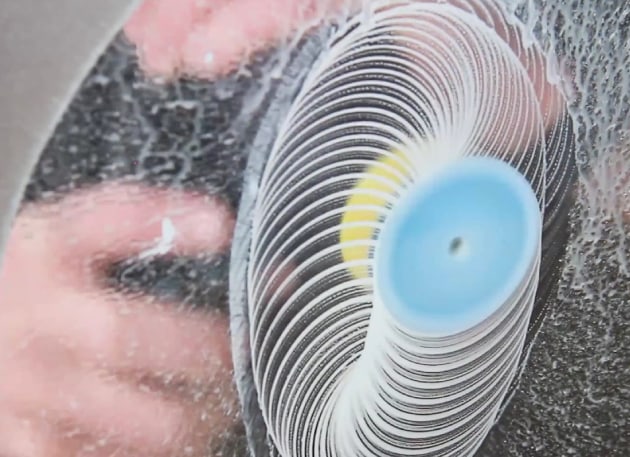
Maintain a milky consistency on the glass by releasing water with the built-in water feed system.
4/6
4/6
How to Remove a Scratch
Step Five
Clean the Glass
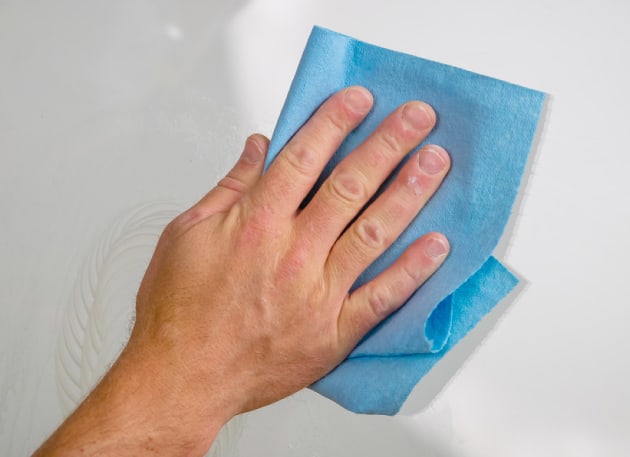
Once the scratch is removed, use water and paper towels to clean the glass.
5/6
5/6
How to Remove a Scratch
Max Demo
See It in Action
Most scratches can be removed in just minutes.
6/6
6/6
Products Used:
Private: Gforce Max Kit
Shop NowRestore Brilliance with Polishing Disks from GlasWeld
Experience the transformative power of GlasWeld’s polishing disks, specially designed to rejuvenate glass surfaces effortlessly. Available in packs of three, these polishing disks are engineered to deliver professional-grade results with ease.
Advanced Polishing Technology
GlasWeld’s polishing disks incorporate advanced technology to effectively restore the luster and clarity of glass. Whether you’re addressing minor imperfections or maintaining pristine surfaces, these disks offer a versatile solution. Designed for user-friendly application, they ensure a smooth finish without compromising the integrity of the glass.
Why Choose GlasWeld ?
- Efficiency: Reduce polishing time with our efficient disks.
- Versatility: Suitable for various glass surfaces including windshields, windows, and more.
- Professional Results: Achieve exceptional results without the hassle.
Applications
Perfect for automotive and architectural applications, our polishing disks provide a cost-effective alternative to glass replacement. Whether you’re a professional technician or a DIY enthusiast, these disks offer the precision and performance needed to maintain glass surfaces in optimal condition.
How to Use
Using GlasWeld’s polishing disks is straightforward:
- Prepare: Clean the surface thoroughly to remove dirt and debris.
- Apply: Attach the disk to a compatible tool and begin polishing at a moderate speed.
- Finish: Polish until achieving desired results, ensuring a uniform shine across the surface.
Customer Satisfaction Guaranteed
In addition, At GlasWeld, we prioritize customer satisfaction by delivering products that exceed expectations. Our products provide reliability and performance that professionals trust worldwide. Experience the GlasWeld difference today and see why our products are preferred in the industry.
Get Yours Today!
Don’t compromise on aesthetics due to dull glass surfaces. Visit our shop to explore our range of products, including polishing disks, and discover how GlasWeld can enhance your maintenance routines. Furthermore Order now and experience the brilliance of GlasWeld’s polishing solutions.
Conclusion
Moreover, GlasWeld’s products are the ultimate choice for restoring brilliance and clarity to glass surfaces effortlessly. Engineered with cutting-edge technology and designed for efficiency, these disks uphold GlasWeld’s commitment to quality and innovation. Transform your glass maintenance today with GlasWeld’s products and witness the difference.
For more information or to make a purchase, visit our Amazon page. Experience the excellence of GlasWeld firsthand with this product and other superior products.